Using Commercial Certificates in vSphere 5.5

I would like to share my experience and findings when working with commercial certificates in vSphere 5.5.  I’ve been working on a customer project where there is a requirement to replace the self-signed certificate of the Web Client with a commercial one. This particular project involved using a Verisign certificate.

I initially used the Certificate Automation Tool to generate the CSR (rui.csr) and the private key (rui.key). Oddly, Verisign is giving the Error 4824 below with the generated CSR:
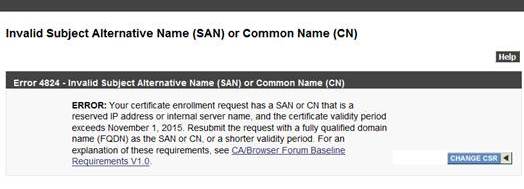
image002

The error points to the Subject Alternative Name (SAN) and specifically because there is a Shortname and Private IP in the SAN field of the CSR which Verisign does not allow. I remember when using the Certificate Automation Tool, the shortname and IP address are fields that must be populated. With the help of my colleague Frank Buechsel (http://fbuechsel.eu/), he recommended to generate the CSR’s manually using KB 2044696.

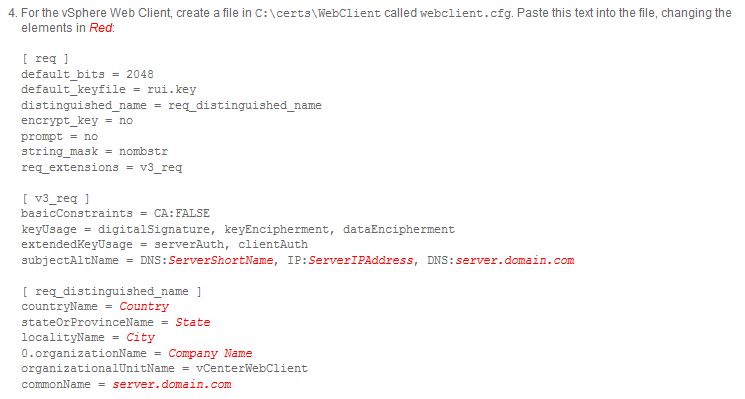
Following the KB article, I created an OpenSSL configuration file for the Web Client using the following format:
ssl

To remove the shortname and IP address, edit the subjectAltName and remove the ServerShortName and IP. It should look like this afterwards:

subjectAltName = DNS:server.domain.com

We can now generate the CSR using the modified configuration file. Following the same KB article, we generated the new CSR using the below commands (openssl is available inside the extracted Certificate Automation Tool):
ssl2

After performing the above steps, we were able to successfully submit the CSR to Verisign.

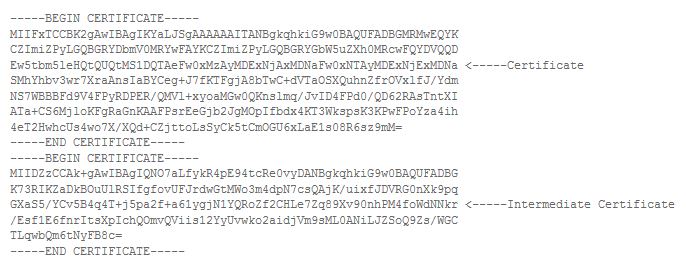
After receiving the certificate in X.509 format, we are ready to install it using the Certificate Automation Tool. I renamed the certificate to rui.crt and attempted the replacement but encountered an error in the tool with a message that the chain cannot be validated. I then checked the downloaded certificate and saw that it does not contain the Intermediate CA in it. So it means that the tool won’t let you install the certificate if the chain to the intermediate CA is missing. We then proceeded to  download the Intermediate certificate from Verisign and again referencing the same KB article, created the chain.pem file in order to have the certificate chain.
ssl3

Using the Certificate Automation Tool with the new chain.pem file, the certificate replacement successfully went through.

To cut the long story short, the key takeaways when using commercial certificates are:

  • Ensure that only FQDN is in the SAN field of the CSR else CSR submission will fail
  • Once you receive the certificate from your commercial CA, verify that the chain to the intermediate CA is present before proceeding with replacement


vCenter Server Install/Upgrade Gotcha when using Custom Install

Starting to prepare now for an upcoming vSphere 5.0 to 5.5 upgrade project and was building my thought process on upgrading the vCenter Server. Should I propose Simple Install or Custom Install? VMware’s recommended method is Simple Install where all components are installed in a single machine/VM. This method puts all components  in the default location in C:\ drive.

But we know that there are customers who have an OS policy that disallows use of C:\ drive for any application other than the OS itself. In this scenario, you will be forced to use the Custom Install method.

But there is one major gotcha with this as I have experienced in my vSphere 4.1 to 5.1 upgrade last year. I was actually surprised that this is still the case in vSphere 5.5. Look at KB 2044953. There is known issue when installing Web Client in a different directory other than the default. Web Client will not work and will throw an HTTP 404 error. The workaround is to re-install web client back to the default directory. There is another alternate workaround stated in the KB to put Web Client in a directory that does not contain spaces. I have not tested this though.

A very short post but I hope this helps vSphere Admins who are planning to upgrade to vCenter 5.5.


Removing Unwanted Plugins in vSphere

I always use my lab to prepare for projects and to learn different VMware products. Of course I don’t have the privilege of keeping all products running due to limited amount of compute resources . As time goes, I have to remove some of the appliances like VDP, vSphere Replication and vShield Manager.

Now that I am introducing NSX into my lab, I have noticed that logging into the Web Client now becomes painfully slow. It now takes about 3 to 4 minutes before I can get into the Web GUI. Once inside, everything is normal. Since NSX can only be configured in the Web client, I need to get this issue resolved.

Searching for similar issues in the web, I saw this one which is the closest to what I’m experiencing. I remember that I have lots of plugins that I no longer use: VDP, vSphere Replication Management and vShield Manager. To remove those plugins, I used this KB article.

Below, I captured the screenshots when I removed my VDP 5.1 plugin.

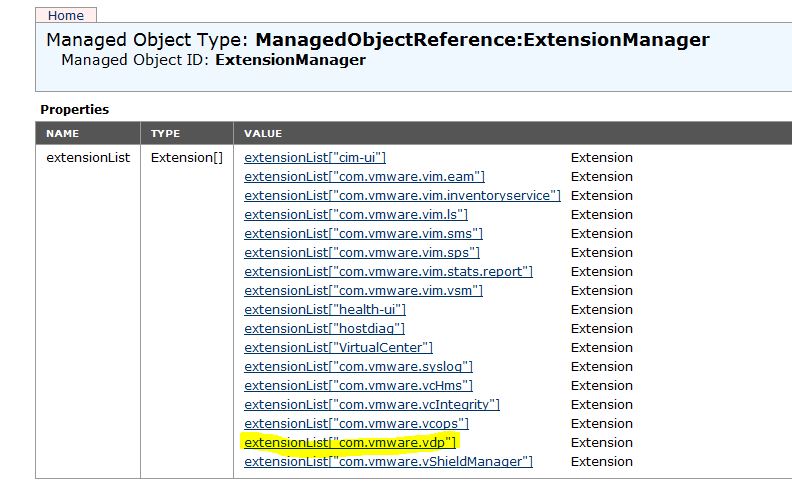
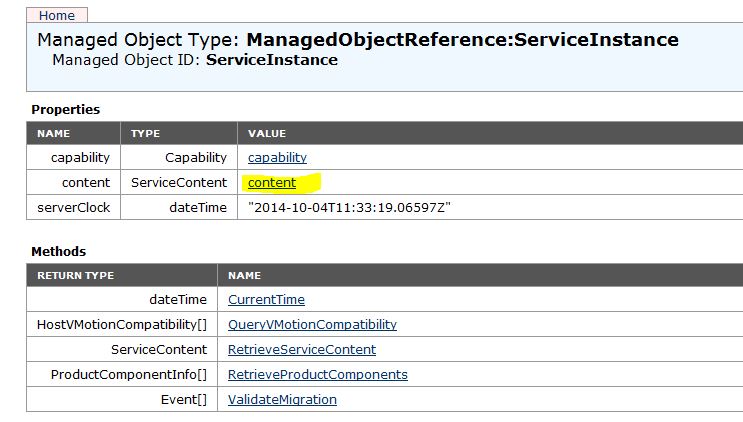
Login to http://<vcenter_name_or_IP>/mob and click content

test1

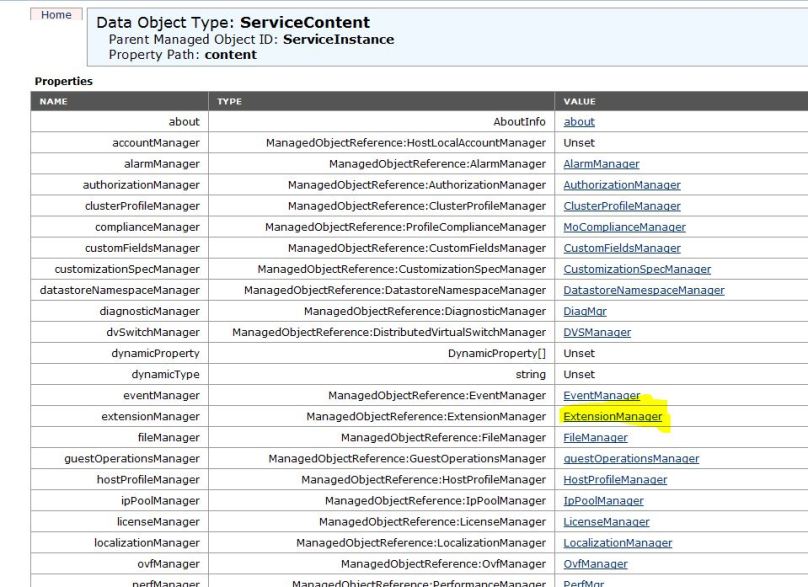
Click ExtensionManager

test2

Select and copy the extension that you are removing. In my case I’m removing the VDP 5.1 extension which is com.vmware.vdp

test3

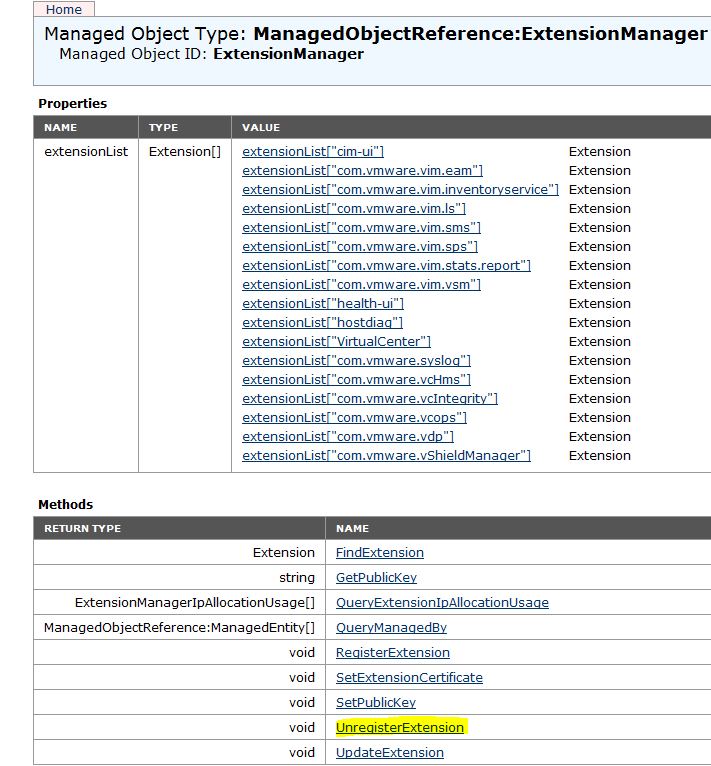
Click UnregisterExtension

test4

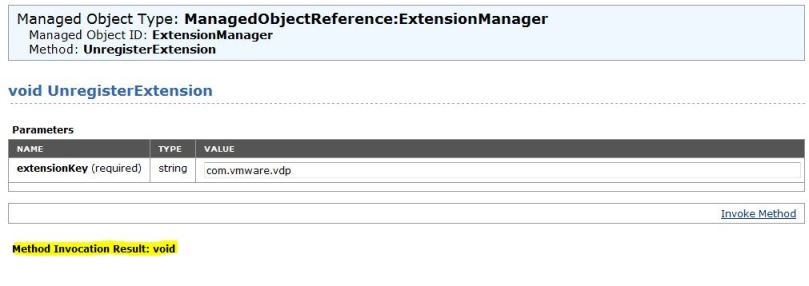
Paste the name of the plugin and click Invoke Method to remove the plugin

test5

You should get the Method Invocation Result: void message which tells you that the plugin has been removed.

test6

I did the same procedure for my vSphere Replication Management (com.vmware.vcHms) and vShield Manager (com.vmware.vShieldManager) plugins and tested login again. And what have you, my web client login is back to normal.

Thoughts on vCenter Server Remediation for Heartbleed bug – vCenter Server with Heartbeat

KB 2076692  documents the vCenter Server upgrade and remediation to address the Heartbleed vulnerability. VMware released 2 updates in vCenter 5.5 which are 5.5.0c (for those in 5.5 GA or pre U1) and 5.5 U1a (for those in 5.5U1). If you read the KB article carefully, updating to those versions is just the first step, you still need to re-issue the certificate for the VMware Directory Service, and change the password for the Administrator@vsphere.local account. Quoting the KB:

“After the vCenter Server environment is upgraded, the Single Sign-On component requires the SSL certificate for the VMware Directory Service to be re-issued and the administrator@vsphere.local password to be changed. Any other vsphere.local users that have been defined will also require their passwords to be changed.

Failure to carry out these actions continues to expose the system to compromise from the OpenSSL Heartbleed vulnerability.”

The steps for re-issuing the certificate is also documented in KB 2076692

So how do we perform this if vCenter Heartbeat is protecting your vCenter Server? In my past articles regarding vCenter Server upgrade, I documented the steps from KB 207181, the steps which i called a re-clone method. I believe that using this method is the easiest way to upgrade your vCenter Server and remediate for the heartbleed bug.

You just have to add the remediation steps for Heartbleed (re-issue the certificate and update the administrator@vsphere.local password) after Step 6 under Upgrading the Primary Node of KB 207181. Just make sure you are using the vCenter Server’s public FQDN and IP address when generating a new certificate.